Large Fabric Flower Tutorial: How to Make Giant Blooms

You spent hours cutting petals, gluing layers, and shaping a giant bloom for a backdrop. Then you stood it up, stepped back, and saw the problem immediately. It looked flat. Or floppy. Or worse, it held together just long enough for setup photos and started sagging once people brushed past it.
That failure usually isn't about talent. It's about scale.
A small craft flower can survive with light glue and a simple pattern. An event flower has to read well from a distance, hold its shape under handling, and still look polished in photographs. That's where most tutorials fall short, and why so many makers get frustrated when they try to size up a flower that was only designed to live on a wall for a short photo.
Most large fabric flower tutorials teach decorative assembly, not event-ready construction. They show gathering stitches, glue guns, and basic petal layering for wall flowers, but they don't address the structural problem of making oversized freestanding flowers over 3 feet that can handle wind or handling. That gap shows up in real maker feedback, with 40% of viewers struggling with stability for photo backdrops in one YouTube thread noted by Sewing Bee Fabrics.
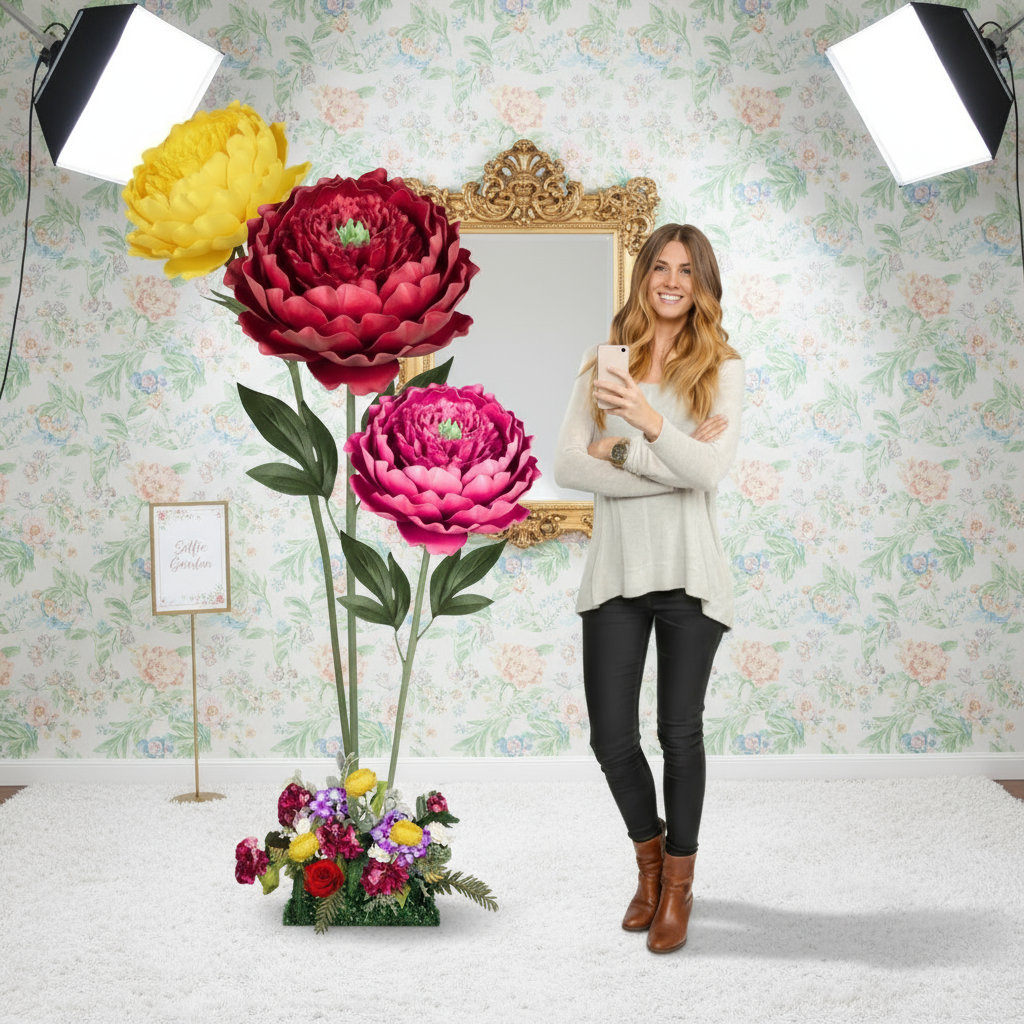
That matters because a flower for a nursery wall and a flower for a wedding entrance are not the same object. One only needs to look nice up close. The other has to survive transport, setup, teardown, and people touching it all day.
Why simple tutorials fail at event scale
The common assumption is that if you make the petals bigger, the flower will still behave the same way. It won't.
Large blooms introduce problems that hobby tutorials usually ignore:
The flower doesn't need more decoration first. It needs better engineering first.
If your goal is a professional result, stop judging the flower while it's still just a stack of petals. Judge it by three things:
For event work, the reliable path is a hybrid build mindset. Use fabric for softness and movement. Use reinforcement where the scale demands it. That may mean stitching instead of relying on glue, adding wire where petals need memory, or building around a stronger internal structure when the flower has to stand independently.
This is the difference between a craft project and an installation piece.
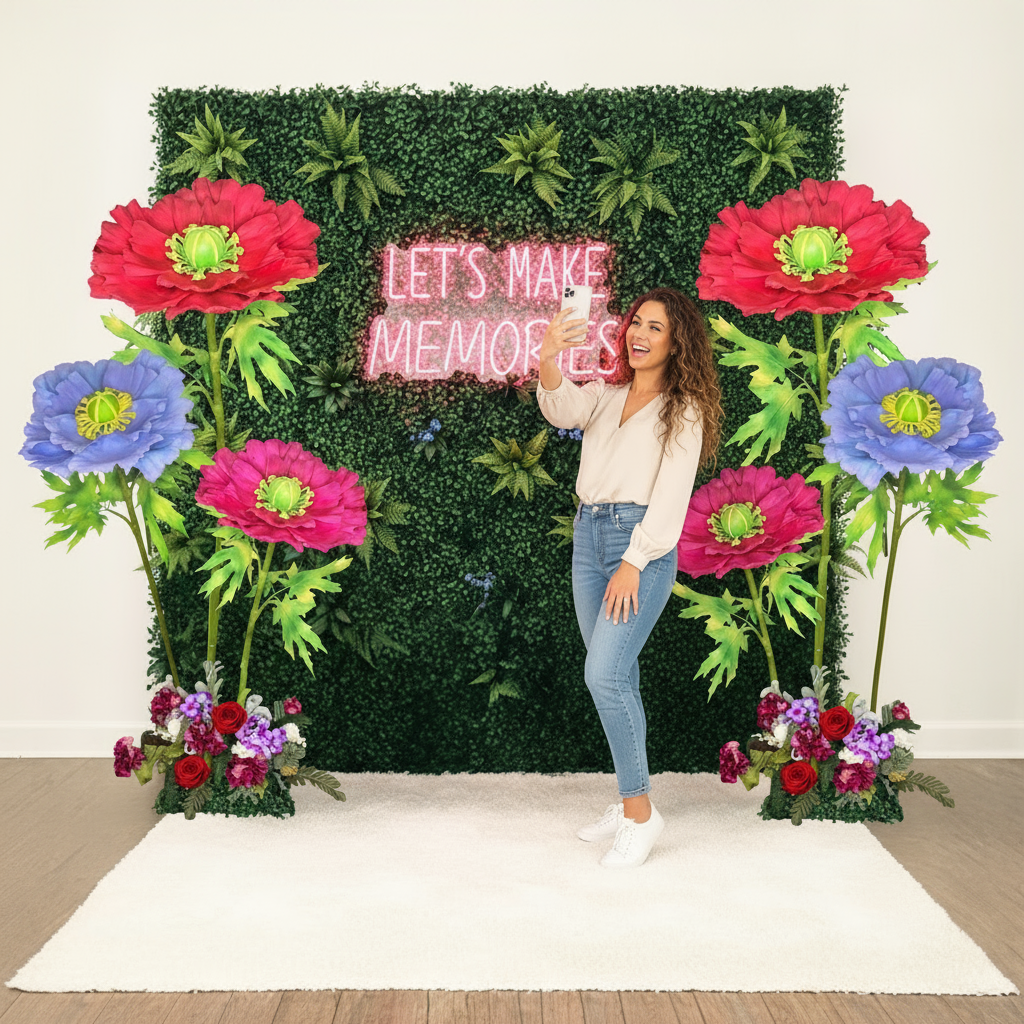
A strong large fabric flower tutorial should help you choose the right material for the job, shape petals so they read in photos, and assemble the bloom so it stays attractive after setup. That's the standard worth building to, whether you're dressing a wedding backdrop, a retail window, or a branded selfie station.
Your Blueprint for Giant Flower Success Materials and Tools
Bad results often start before the first cut. Makers mix soft fabric with the wrong adhesive, choose wire that's too weak for the petal size, or pick a material that doesn't suit the venue. If you want giant flowers that look intentional, your material choice needs to match the job.
Some projects want softness. Others want resilience. Some need both.

Fabric is usually the better choice when you want movement, drape, and a more romantic finish. Cotton gives you body and is easier to gather cleanly. Organza gives you light transmission and a softer edge, especially for wedding work. If you're sorting through natural fiber options for softer blooms, this guide to understanding the differences between materials like linen vs cotton is useful because hand feel and structure change how petals sit.
EVA foam solves a different problem. It holds a sculpted curve well, travels better, and is easier to use for freestanding or repeated-install pieces. If you're deciding whether foam makes more sense for your build, this overview of types of foam for flower making is worth reviewing before you buy supplies.
Material Comparison Fabric vs. EVA Foam
| Attribute | Fabric (Cotton, Organza) | EVA Foam |
|---|---|---|
| Best look | Soft, airy, textile-rich | Sculptural, crisp, bold |
| Best use case | Weddings, editorial backdrops, elegant interiors | Retail displays, festivals, freestanding installs |
| Shaping method | Gathering, stitching, singeing, wiring | Heat shaping, molding, wiring if needed |
| Transport | Can crease or crush if packed poorly | Generally easier to stack and move |
| Repair on-site | Slower if stitching is involved | Faster for quick glue repairs |
| Finish | Natural and romantic | Graphic and high-impact |
The toolkit that earns a cleaner finish
You don't need an oversized craft room, but you do need the right tools on the table before you start.
A few practical pairings remove a lot of frustration:
When makers complain that giant flowers are tedious, the actual issue is usually preventable friction. Wrong material. Wrong adhesive. Wrong scale for the method.
At event scale, petal shaping is where a giant flower earns its keep. A bloom can have beautiful fabric and a strong color story, but if the petals stay flat, the finished piece reads like a backdrop prop instead of a dimensional installation piece.

Large flowers magnify every small mistake. One uneven cut throws off a whole ring. A weak cup shape collapses once the flower is upright under venue lights or airflow. Small craft tutorials rarely deal with that problem because a tabletop bloom does not have to hold its profile from ten feet away.
Consistency is what gives oversized flowers a professional silhouette. For cotton flowers built for backdrops or freestanding displays, a reliable starting formula is 7 circles at 12 inches and 2 center circles at 5 inches, based on this large fabric flower method. Those measurements are easy to scale, and they produce a full bloom without crowding the center too early.
If you cut by hand, make one clean master template and stick to it. If you cut digitally, use clean vector files so every petal in the set matches. This guide to SVG and Cricut flower files is useful if you want repeatable shapes for larger production runs.
Three habits save time here:
That last point matters more than many makers expect.
For cotton, the shape comes from controlled gathering. A loose running stitch around the edge lets the fabric pull into a soft cup that reads like a petal instead of a flat circle.
Use this sequence:
The common failure here is over-pulling. New makers often chase a tighter gather, and that is when the thread snaps, the edge puckers unevenly, or the petal twists into a shape that will not sit cleanly in the flower.
Practical rule: Aim for a controlled cup, not a tight ruffle. Large flowers need open, readable petals.
For event work, I would rather make one extra petal than force a misshapen one into the build. Forced petals create gaps, crowd the center, and make the whole bloom look nervous.
The center needs dimension too. In the same cotton method, 2oz light wadding inside the two center circles creates a raised middle instead of a flat padded dot. Top-stitching those circles before assembly gives you a cleaner, more finished center and helps it hold up during transport.
The shaping approach changes with the material. The principle does not.
Professional-grade kits and materials make a real difference. Hobby supplies can work for small decor, but for large flowers that need to stand through setup, photos, guest traffic, and teardown, the petal has to keep its form without constant repair.
If the petal only looks good while you are holding it, it is not ready for assembly.
Assembly decides whether the flower looks event-ready under venue lighting or homemade from six feet away. Large blooms magnify every weak choice. Uneven spacing, bulky glue lines, and a soft base all show up once the flower is on a wall, stand, or backdrop.
Start by setting the base and the viewing angle. I assemble with the flower facing me, not flat on the table, because giant petals can look balanced from above and still read lopsided from the front.

Place the first tier with intention. For gathered cotton flowers, use 2 to 3 petals per tier, then offset the next tier slightly so the joins disappear and the flower gains depth instead of forming stacked rings. The same method noted earlier works well here.
Use this sequence:
- Set the outer ring first: Space the largest petals evenly around the base.
- Pause and check the front view: Fix drift early, before the center locks the shape in place.
- Layer inward: Each row should hide the attachment points behind it.
- Install the center last: This leaves room to correct gaps, tilt, or crowding.
Large flowers need breathing room. New makers often pack the middle too tightly, which makes the bloom look pinched and smaller than it is.
A flower for a nursery wall and a flower for a wedding install are not built the same way. Fabric petals give softness and movement, but they need cleaner glue placement and more support as the scale increases. EVA foam holds shape better, travels better, and is usually the safer choice for freestanding work or repeated setup.
For oversized event pieces, distribute weight across the base instead of stacking everything into the center. That matters even more on foam builds with deep cupped petals. Studying oversized foam flower wall art helps train your eye to spot proper depth, spacing, and weight balance in large-format flowers.
Build from the audience side. Guests see the face of the bloom, not the logic of your glue pattern.
That one rule prevents several common problems at once:
Check each tier before adding the next. A quick correction now saves a full rebuild later.
Inspect the flower three ways:
A quick visual demo helps if you're building your first large bloom:
Strong assembly comes from small corrections made at the right moment.
A polished giant flower should look layered and intentional. If it only works from one angle, it is not finished.
A giant flower usually proves itself at the venue, not on the worktable. It has to survive loading, setup, guest traffic, heat from lights, and teardown without looking tired by hour two.
That is why finishing matters so much. Good finishing makes the flower read like a deliberate design piece and keeps it usable for more than one event.

Reinforce delicate petals the right way
Large-scale organza looks beautiful, but it can fail fast if the edges and veins are left untreated. In high-traffic installs, raw edges tend to fray, catch, and lose their clean outline. For synthetic organza, cut the petals first, then carefully singe the edge to control fraying and give the petal a finished line.
Wire matters too. A light floristry wire along the center vein helps the petal hold a curve instead of drooping flat halfway through the event. I use this step on any bloom that needs to hang on a wall for hours, travel to a second venue, or sit near an entry where air movement is constant.
Cardstock or another firm base also earns its place on larger flowers. It keeps the bloom from twisting as layers settle, especially on wide peonies, roses, and fantasy flowers with mixed materials.
On oversized flowers, edge finishing and petal support are part of the build, not a last-minute cosmetic fix.
If you want more depth in foam leaves, centers, or accent petals, this guide to painting EVA foam flowers shows how to add color without clogging the surface texture.
The same flower pattern can read soft and romantic or bold and graphic, depending on how you finish it.
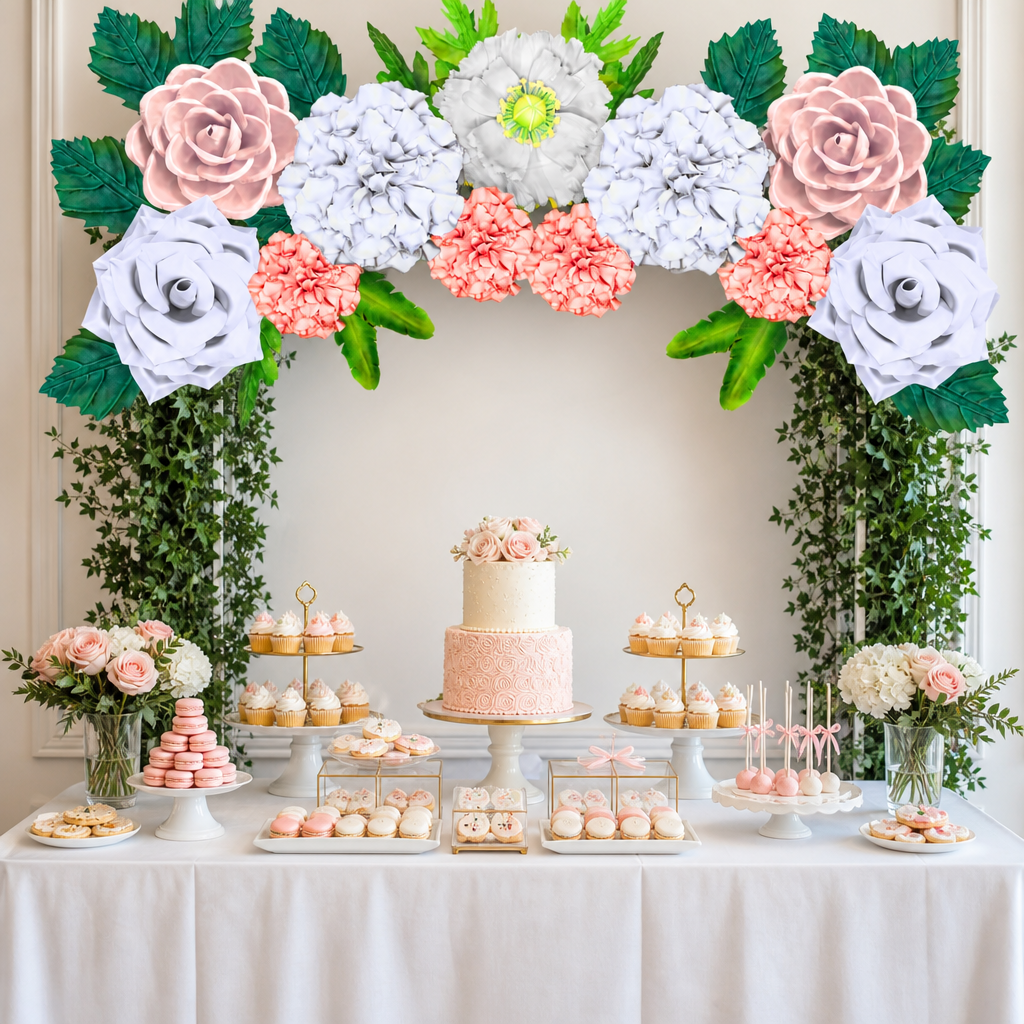
If the flower is part of a full reception design, these DIY wedding centerpiece ideas can help you build a table story that feels connected instead of pieced together.
The shape language changes from flower to flower. The base technique can stay the same.
This is also the stage where professional kits save time. Amazing Giant Flowers kits and supplies help close the gap between hobby results and event-ready work because the templates, foam, and specialty materials are sized for oversized blooms, not miniature craft flowers scaled up by guesswork.
Finishing includes the back of the flower, not just the front. A bloom can look perfect in photos and still fail because the mount flexes, the stem is underbuilt, or the angle fights the weight of the petals.
The cleanest custom work comes from practical choices. A flower that keeps its shape, packs without damage, and still looks polished on-site is the one clients remember.
A giant flower can look flawless in the studio and still fail the job once it goes in a van, sits in heat, or gets handled by a busy setup crew. These are the questions that matter if the flower needs to survive transport, install fast, and come home in one piece.
Pack for shape, not just for storage. Fabric flowers need support under the petal curves, so tuck acid-free tissue paper or clean packing paper between petals instead of pressing everything flat. A wardrobe box, extra-deep moving box, or plastic tote works better than a shallow bin because the bloom can sit upright with less pressure on the face.
For EVA foam flowers, watch heat as much as weight. A closed car in the sun can soften petals enough to change their curl. I keep foam blooms in tall boxes, tape the stem or back mount so the flower cannot slide, and use light tissue to stop petal edges from rubbing each other.
Large installs should travel in parts whenever the design allows it. Removable centers, detachable stems, and separate wall mounts cut damage fast and make on-site handling easier.
Yes, with restraint. Start with a clean, soft makeup brush or microfiber duster to lift surface dust, especially around the center where lint collects. If you need more than that, use a barely damp cloth and test a hidden spot first because some fabrics water-mark and some glues can release if they get too wet.
Avoid soaking an assembled flower unless you built it with washable fabric and a water-resistant adhesive system from the start. Most event flowers are better maintained through storage discipline than deep cleaning. Bag them after teardown, keep them off venue floors, and do not let crushed petals sit dirty in a transport bin for a week.
Start with the wall measurements, then decide whether the design needs coverage or breathing room. A sparse luxury backdrop often reads better than a wall packed edge to edge with flowers that fight each other.
Map the layout before you cut anything. Mark your largest focal blooms first, place medium flowers where the eye needs support, then add leaves or smaller pieces only where the composition feels thin. For wedding work, these examples of large flower arrangements for weddings are useful for judging scale, spacing, and how many oversized blooms a ceremony wall or photo area can hold without looking crowded.
They assemble too early.
Petals need shape before they go on the base. If the cup is too shallow, the edges are identical, or the petal count is doing all the work, the flower reads flat and stiff from more than a few feet away. The second common failure is an underbuilt center connection. The bloom may hold on the table, then start twisting once it is mounted upright.
Glue is another weak point. Heavy glue lines telegraph through thin fabric, stringy hot glue catches light in photos, and excess adhesive adds bulk where you want a clean transition.
Are fabric or foam flowers better for repeated use?
Repeated-use pieces usually favor EVA foam because it is lighter, faster to reheat and reshape, and less likely to wrinkle during travel. Fabric has the better hand and better movement, especially for romantic work, but it asks for cleaner handling and better packing.
The best event flowers often combine both. Use foam where structure matters, especially near the base or inner petals, and use fabric where softness matters most. That hybrid approach is one of the clearest differences between small craft tutorials and event-grade builds. At large scale, material choice affects labor, repair time, and whether the flower still looks polished after its fifth install.
A flower that travels well is often more valuable than a flower that looks perfect only on the worktable.
Use the method that matches the load. Sew gathered cotton or satin petals when the fabric frays, stretches, or needs a cleaner attachment point than glue can give. Use glue for fast placement, foam construction, and areas where stitching would print through the front. Use wire, backing discs, or mechanical support when the bloom is large enough to fight its own weight.
Glue alone can work on some oversized flowers, but it is not my first choice for pieces meant for repeated installs. If a client is paying for event-ready flowers, build them like they will be packed, unpacked, touched, and mounted more than once.
If you want professional supplies, oversized flower kits, and custom statement blooms built for weddings, retail displays, festivals, and brand activations, explore Amazing Giant Flowers. Their handcrafted installations and maker-friendly DIY resources are designed for people who need giant flowers that do not just look good in progress photos, but perform beautifully at the event too.
Ready to Create Something Amazing?
Browse our collection of giant flower kits and start your next project.
Shop All Flowers