Wedding Photo Booth Backdrop Ideas for Your Big Day

When you start thinking about the perfect wedding photo booth backdrop ideas, the best ones always come from the heart. They’re a reflection of your style as a couple and a seamless part of your wedding's overall theme, creating a space where guests can make some truly unforgettable memories. From romantic flower walls and edgy neon signs to rustic wooden arches and playful balloon garlands, the goal is to create a focal point that's as beautiful as it is interactive.

Think of your photo booth as the vibrant, beating heart of your reception's entertainment. And the secret sauce? A killer backdrop. That's what turns a simple corner into a magnetic, high-energy experience. It’s the difference between a few polite pictures and a whole gallery of personality-packed memories you'll treasure forever.
A great backdrop is more than just pretty scenery; it’s an open invitation. It naturally pulls guests in, giving them a reason to mingle, laugh, and shed their inhibitions. This is the perfect way to keep the energy high after the ceremony, offering everyone a fun, creative outlet and an instant conversation starter.
An amazing backdrop also pulls double duty as a powerful piece of décor. It amplifies your wedding's theme and aesthetic, tying the whole event together. When every photo feels cohesive and professionally styled, you unlock several key benefits:
The rise of interactive wedding entertainment is undeniable. A beautifully styled photo booth backdrop isn't just a trend; it's a direct response to couples wanting to give their guests an experience, not just an event.
This shift towards guest experience is clearly reflected in the numbers. Wedding photo booth bookings have shot up by a huge 48% recently, pointing directly to a real desire for interactive fun that captures candid, unforgettable moments. Even more telling, an incredible 94% of couples who had a photo booth said their guests absolutely loved sharing the digital and printed photos.
Ultimately, when you invest in a great backdrop, you’re investing in your guests' happiness and the lasting power of your wedding memories. You can find tons of incredible wedding photo booth backdrop ideas in our inspiration gallery. From jaw-dropping oversized floral installations to accessible DIY kits, the perfect option is out there for every couple.
Choosing the right theme for your wedding photo booth isn't just about picking a pretty background. Your backdrop is a chance to tell your story and create an immersive little world that screams you. It's where you move past generic decor and build something that truly captures the spirit of your wedding day.
Let's walk through four popular themes, breaking them down with clear steps and styling tips to help you envision a backdrop that feels authentic and becomes a highlight of your reception.
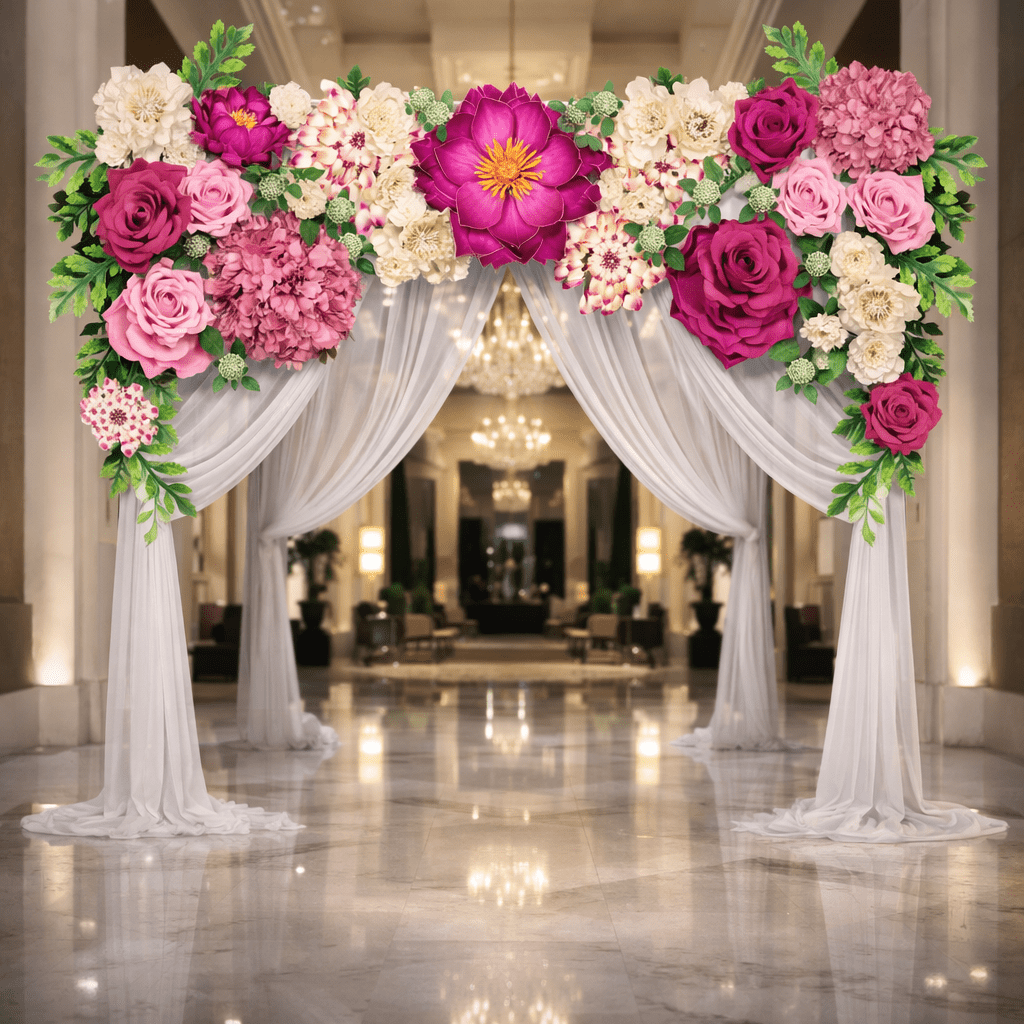
Use Case: Ideal for the couple dreaming of a classic, storybook wedding. This style is all about soft colors, delicate textures, and an atmosphere of pure elegance, creating a space that feels both luxurious and intimate. Benefit: This look is universal and enduring; these photos will never feel dated.
To bring this vision to life, follow these steps:
This theme is perfect for ballroom receptions, garden parties, or historic estate weddings. The photos are guaranteed to be both elegant and heart-stoppingly beautiful.
Use Case: Perfect if your personal style is more "less is more." This theme is built on clean lines and high-impact materials. Benefit: It creates a striking look that feels uncluttered and lets your guests—and their personalities—be the stars of the show.
Follow these steps for a sleek, contemporary look:
A minimalist design is not about what you can add, but what you can take away. For a wedding backdrop, this means every single element must be purposeful and beautiful in its own right, contributing to a clean, impactful aesthetic.
This style is perfect for industrial lofts, art galleries, or any venue with strong architectural features. For more inspiration, you can explore a variety of selfie stations that bring these concepts to life.
Use Case: For couples who feel most at home in nature and love a cozy, down-to-earth atmosphere. Perfect for barn, vineyard, or countryside weddings. Benefit: Its relaxed and inviting feel encourages guests to let loose and have fun, resulting in authentic, joyful photos.
To create this look, your main focus should be on bringing the outdoors in.
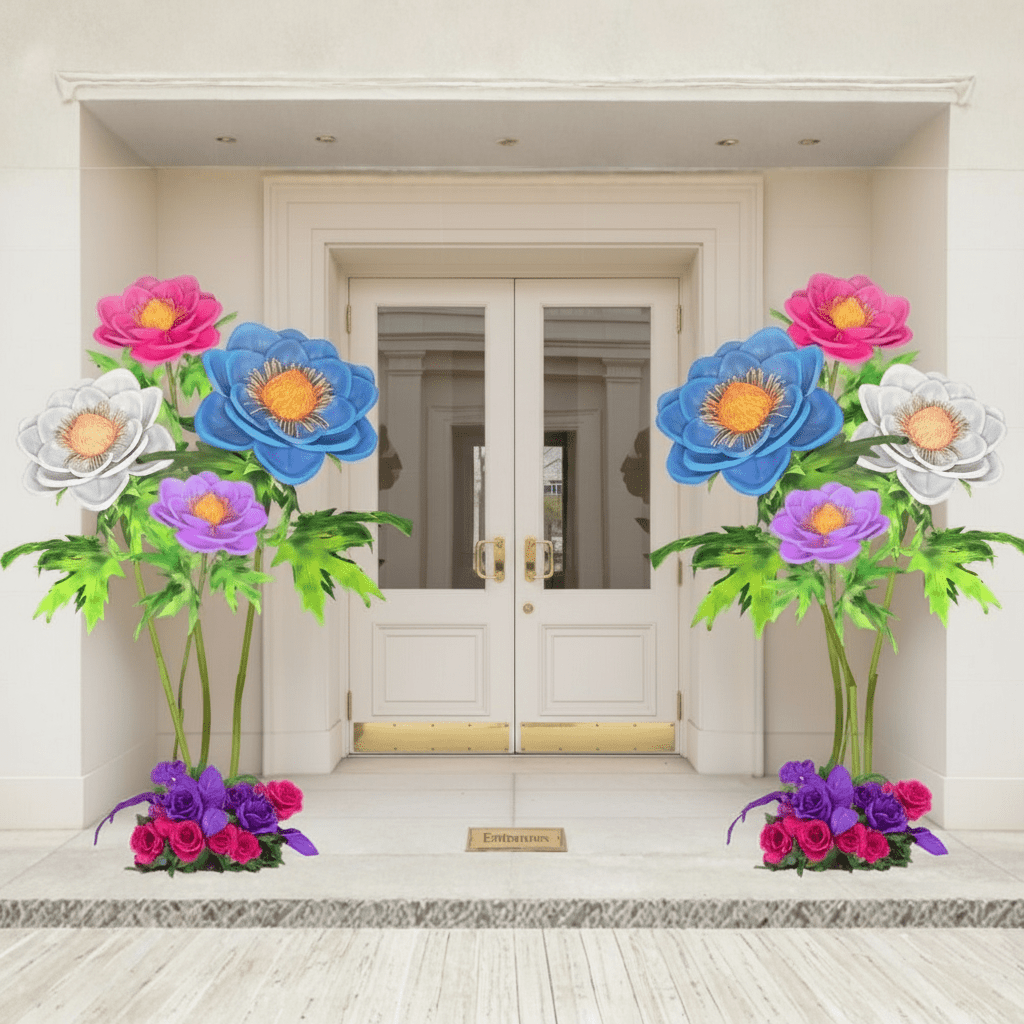
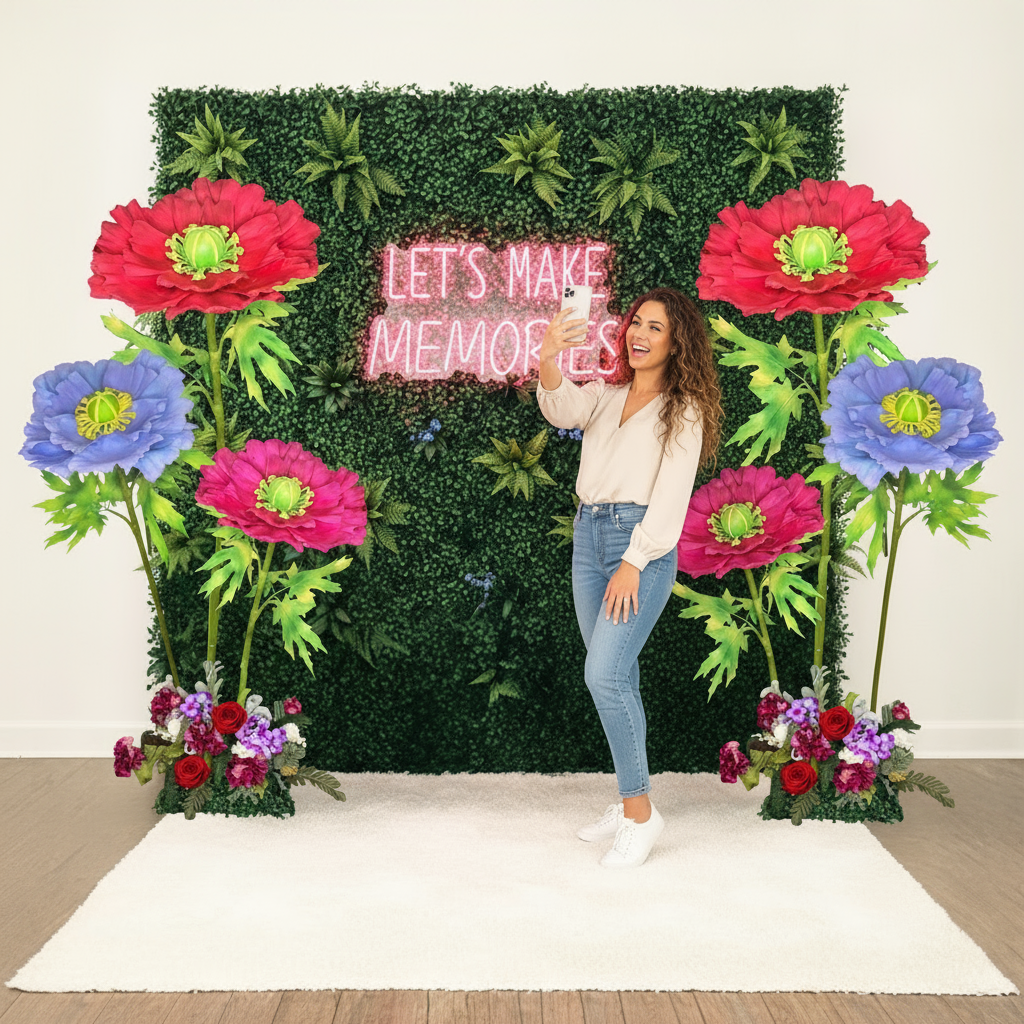
Use Case: For the free-spirited couple who wants their backdrop to feel artistic, deeply personal, and full of texture. Benefit: The rich visual texture creates photos that are warm, dynamic, and bursting with personality.
Here's a step-by-step guide to a stunningly boho-chic installation:
So, you have a vision for your photo booth backdrop. Now for the big question: do you roll up your sleeves and build it yourself, or do you hire a professional to handle everything? This decision really boils down to your budget, your timeline, and how much creative energy you have to spare.
Let's walk through both options. There’s no right or wrong answer here—just what feels right for you and your wedding day.
The Case for a DIY Backdrop
Going the Do-It-Yourself route can be an incredibly fun and rewarding project, especially if you and your partner love getting creative. This path is fantastic for your wallet and allows for ultimate creative control. And with today's high-quality DIY kits, you don't have to sacrifice a professional look to save money.
Key Benefits of a DIY Approach:
If you’re leaning toward a hands-on project, we’ve gathered even more ideas in our guide on DIY wedding backdrop ideas, which is packed with practical tips to get you started.
This decision tree helps you navigate popular wedding photo booth backdrop ideas by leading you from a starting point to themes like Modern, Rustic, and Romantic.
 This visual guide makes it simple to see how different aesthetic choices can come together to create a specific, cohesive theme for your event.
On the other hand, a custom installation is your saving grace if your to-do list is already a mile long. The main benefit is simple: peace of mind. When you hire professionals, you can share your vision and then completely check out, trusting that they’ll execute it flawlessly.
A pro team handles it all—from the initial design concepts and mockups to the final, perfect setup on your wedding day. This takes a massive task off your plate, freeing you up to actually enjoy the final weeks of your engagement. If you’re considering a custom installation, exploring the available custom printing options can open up even more possibilities to make your backdrop truly one-of-a-kind.
A professional installation is an investment in a stress-free experience. It ensures your backdrop is not only beautiful but also structurally sound, perfectly lit, and installed on time without you lifting a finger.
This route is ideal for anyone dreaming of a complex design, a large-scale installation, or for couples who simply want a guaranteed "wow" factor without any of the work.
To help you land on the right choice, a direct comparison can make all the difference. Think honestly about what you value most for your big day.
Ultimately, whether you choose to DIY or hire a pro, the goal is exactly the same: creating a beautiful, engaging space where you and your guests can make memories. By weighing these factors and being realistic about your time, budget, and creative energy, you can confidently pick the path that will make your photo booth a stunning success.
So, you've spent hours scrolling through inspiration and have a vision for the perfect wedding photo booth backdrop. Now what? Turning that idea from a digital dream into a physical reality is easy with a bit of planning.
Think of it like following a recipe. This guide is your recipe for a flawless backdrop, helping you create a perfectly-sized, well-lit, and beautifully-placed photo-op.
Before you fall in love with a single flower or fabric swatch, grab a measuring tape. This first step is the foundation for everything else, ensuring your backdrop fits the space perfectly.
Start by measuring the exact spot where the photo booth will live. Get the width, depth, and ceiling height. But don't stop there. Consider the practicalities to ensure a smooth guest experience:
A well-placed backdrop doesn't just look good—it elevates the entire atmosphere of the room. When you map your space first, the installation feels intentional and beautifully integrated, not just plopped in a corner.
With your measurements in hand, you can get to the fun part: picking the materials that will bring your theme to life. This is where you translate your vision into texture, color, and shape. Your choices should be both beautiful and practical. An outdoor wedding in a breezy location, for instance, calls for sturdier, weather-resistant materials. For ideas on creating stunning floral designs that can handle different environments, our guide to building durable paper flower backdrops is a great resource.
Next, it’s time to build. If you have a DIY kit, carefully unbox everything and follow the assembly instructions. If you've hired a professional, it's about confirming the installation timeline so the setup is complete long before your first guest walks in.
Even the most gorgeous backdrop will look dull in photos without the right lighting. The goal is to create soft, even light that makes everyone look their best. A few simple strategies can make all the difference.
Simple Lighting Solutions for a Flawless Glow:
Finally, style the scene. This is where you add the small, thoughtful details that make your photo booth an immersive experience.
A beautiful backdrop is only half the story. To get those truly unforgettable images, you need to bridge the gap between great design and a little technical know-how. By understanding a few key principles, you can create an environment where every single photo looks incredible, ensuring you and your guests have keepsakes to treasure forever.
Understanding How Materials Interact with Light
The materials you pick for your backdrop do more than just set a theme—they actively shape the final look of your photos by the way they interact with light. Different backdrop materials will either absorb or reflect light, which has a direct impact on the final image.
For example, materials like our EVA foam flowers have a soft, matte finish that absorbs light beautifully. This creates rich, saturated colors while minimizing any harsh glare, making it easier to get flattering shots.
Here’s a quick listicle of how common materials play with light:
Let's be clear: professional lighting is the single most important factor for getting stunning photos. It’s what separates flat, shadowy pictures from images that are vibrant, dimensional, and full of life. Great photo booth lighting isn't about being brighter; it's about being smarter. The goal is to create a soft, even wash of light that makes everyone look their absolute best.
Investing in proper lighting for your photo booth is as crucial as the backdrop itself. It ensures that the colors of your design pop, skin tones look natural, and every guest feels confident and camera-ready.
By 2026, photo booths are becoming complete design stars, with elaborate backdrops like giant floral installations taking center stage. Industry trends show open-air booths are now dominant for capturing large group shots, though enclosed booths still hold 35.4% of the market for their intimate and playful vibe. With the market projected to hit $639.1 million this year and 70% of couples demanding interactive entertainment, a well-lit, beautifully styled booth is a must-have.
Props are the final, fun ingredient, but they should always complement your theme—not overwhelm it. The best props feel like a natural extension of your backdrop and wedding style. If you want to make sure every guest looks their best, it's worth exploring some useful wedding photography tips to capture stunning photos.
Here’s a clear plan for choosing props that add to the experience:
As you put the finishing touches on your wedding plans, it's natural to have questions about the photo booth. This section provides clear answers to the most common queries, so you can feel completely confident about your backdrop choice.
The sweet spot for planning your photo booth backdrop is 4-6 months before your wedding day. This gives you plenty of breathing room to browse designs, compare quotes, and lock in your favorite option.
This timeline is especially critical in two use cases:
An outdoor wedding is gorgeous, but your backdrop needs to be as tough as it is beautiful. You need something that can handle wind, sun, or even a surprise sprinkle.
Here are the best materials for a backdrop that can hold its own outdoors:
- Weather-Resistant Flowers: Look for blooms made from durable materials like EVA foam. Unlike delicate paper, EVA foam keeps its shape and rich color, even if it gets a bit damp.
- Sturdy Frames: A solid foundation is absolutely non-negotiable. Look for backdrops built on weighted metal or solid wood frames that won’t get knocked over by a breeze.
- Weighted Fabrics: If you're using drapes, go for heavier materials like canvas or thick cotton. Make sure they are securely weighted at the bottom so they hang beautifully instead of flying around.
Choosing weather-proof materials is really about buying peace of mind. You can relax knowing your backdrop will look picture-perfect all night long.
How Can I Create a Unique Backdrop on a Budget?
Creating a "wow" moment doesn't always demand a "wow" budget. The trick is to be strategic. By focusing your funds on one high-impact element, you can create a far bigger impression than you would with a dozen smaller decorations.
The secret to a budget-friendly backdrop is creating a powerful focal point. Concentrate your spending on one unforgettable element, and you’ll get a high-end look without decorating the entire venue.
Here are a few ways to get a stunning look for less:
- Go Big with a Few Blooms: Instead of a full flower wall, use just three to five oversized, handcrafted flowers. A dramatic cluster of giant roses or peonies against a simple fabric panel feels artistic and expensive for a fraction of the cost.
- Embrace DIY Kits: A high-quality DIY kit is the perfect compromise between a fully custom design and starting from scratch. You get professional-grade materials and clear instructions to assemble a polished backdrop yourself, saving a ton on labor costs.
- Harness the Power of Fabric: Never underestimate a single, gorgeous bolt of fabric. A panel of rich velvet or shimmering sequins, when hung well, creates a backdrop that's simple, elegant, and incredibly effective.
By focusing on impact over quantity, you can design a memorable backdrop that still respects your budget. If you're curious about what a custom design might cost, you can easily request a free quote and mockup to see what's possible.
At Amazing Giant Flowers, we live to turn wedding backdrop ideas into breathtaking realities. Whether you fall in love with a fully custom installation or one of our beautiful DIY kits, our handcrafted floral designs create unforgettable, camera-ready moments. Explore our collections and let us help you build the backdrop of your dreams at https://www.amazinggiantflowers.com.


Ready to Create Something Amazing?
Browse our collection of giant flower kits and start your next project.
Shop All Flowers